Slicer setup
Every slicer needs three things for auto-eject:
| What | Why | |
|---|---|---|
| 1 | Object labels in the G-code | AUTO_EJECT plans the sweep from the part outlines |
| 2 | Start G-code with AUTO_EJECT_GUARD and EJECT_PURGE |
Never print on old parts. A purge pellet the sweep can remove |
| 3 | End G-code with AUTO_EJECT ... HOME=1 |
Runs after your end macro, which retracts the filament while the nozzle is still hot |
The examples call your start macro PRINT_START and your end macro PRINT_END. Use the names
your configuration uses (START_PRINT, DEMON_START, …).
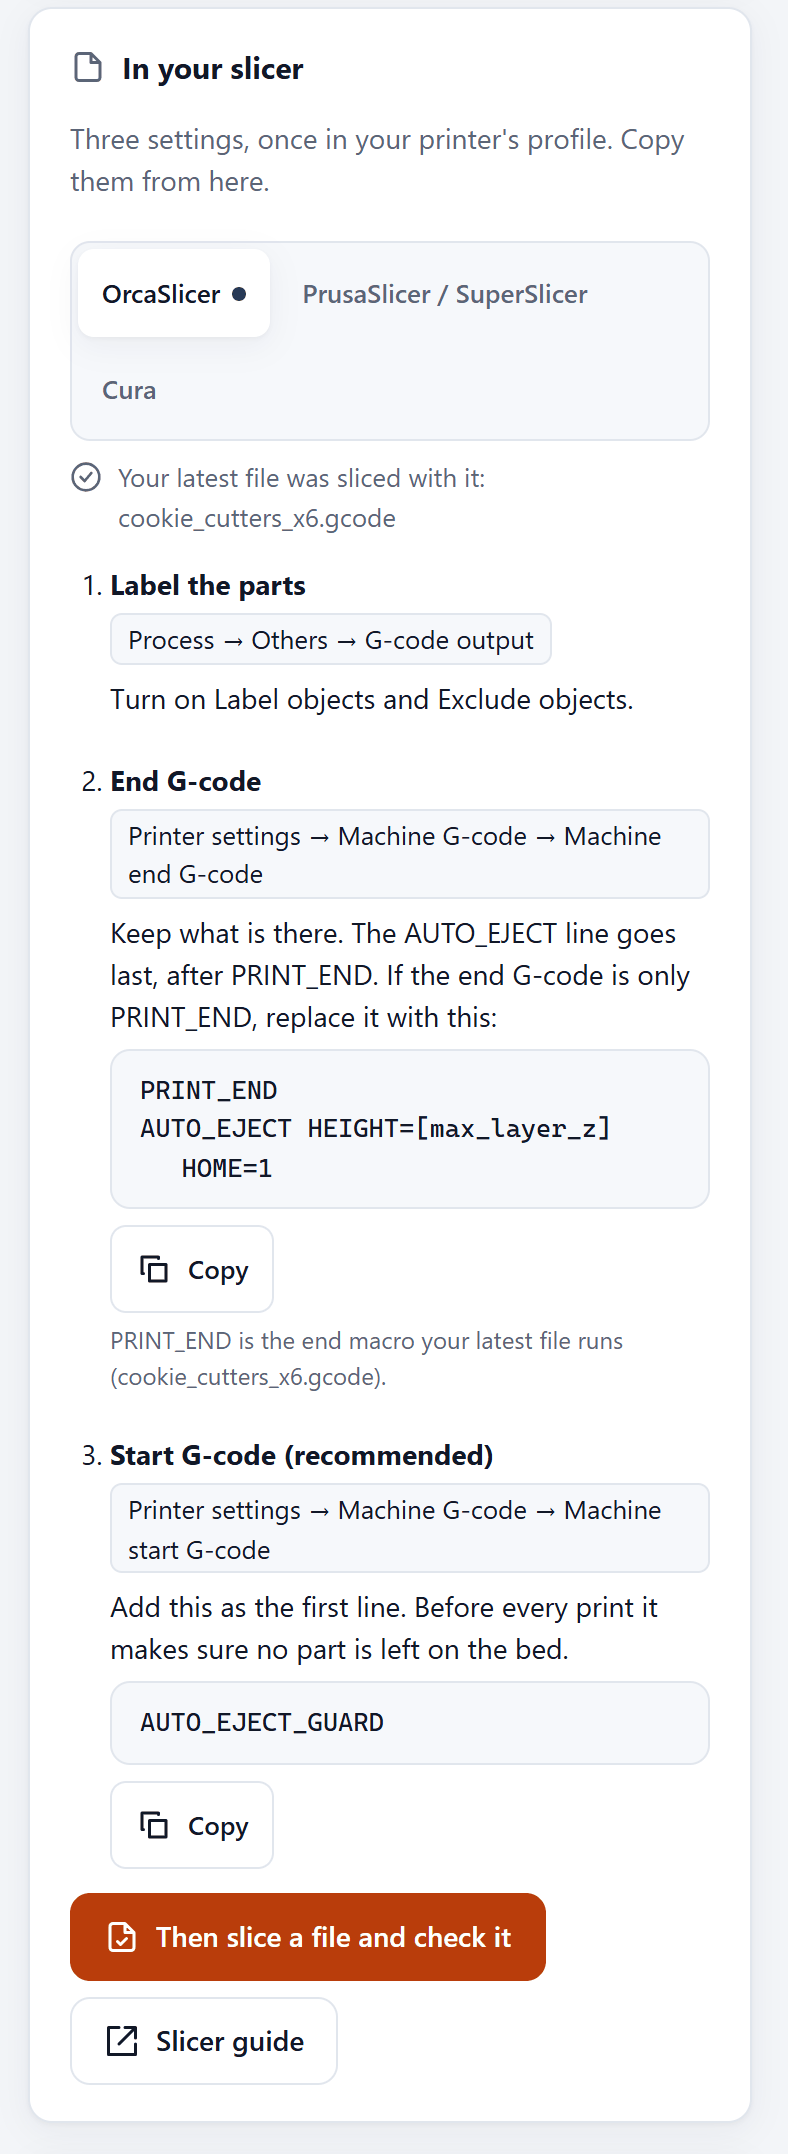
Easier: the web page's Blade and setup tab has a card, In your slicer, with these lines ready to copy and your printer's own end macro already in them, found in its newest file or its config.
Guard.
AUTO_EJECT_GUARDgoes first. It stops the print, or ejects first, if parts from an interrupted print may still be on the bed (recovery.md).Purge.
EJECT_PURGEruns afterPRINT_START, so turn off the purge line inside your start macro (KAMPLINE_PURGE, DEMON purge line, Voron purge). Otherwise you get both.
Temperature placeholders at a glance
| Slicer | Bed (first layer) | Nozzle (first layer) |
|---|---|---|
| OrcaSlicer | [bed_temperature_initial_layer_single] |
[nozzle_temperature_initial_layer] |
| PrusaSlicer / SuperSlicer | [first_layer_bed_temperature] |
[first_layer_temperature] |
| Cura | {material_bed_temperature_layer_0} |
{material_print_temperature_layer_0} |
OrcaSlicer
Object labels: Process → Others → G-code output: turn on Label objects and Exclude objects.
Printer settings → Machine G-code → Machine start G-code
AUTO_EJECT_GUARD
M104 S0
M140 S0
PRINT_START BED=[bed_temperature_initial_layer_single] EXTRUDER=[nozzle_temperature_initial_layer]
EJECT_PURGE
Machine end G-code
M104 S0 / M140 S0 before the macro stop Orca from adding its own heat-and-wait commands.
HEIGHT=[max_layer_z] passes the print height, so stencils and other
thin prints are recognised and left alone. AUTO_EJECT goes
after the end macro: end macros retract the filament, which Klipper refuses once the nozzle
has cooled, and HOME=1 homes again around the parts if the end macro turned the motors off
(integration.md).
To cool the bed to another temperature for some materials (cool_temps),
pass the material too: AUTO_EJECT HEIGHT=[max_layer_z] MATERIAL=[filament_type] HOME=1.
PrusaSlicer / SuperSlicer
Object labels: Print Settings → Output options → Label objects: Firmware-specific (with G-code flavor Klipper). Older SuperSlicer builds only write comments. If so, use Moonraker object processing.
Printer Settings → Custom G-code → Start G-code
AUTO_EJECT_GUARD
M104 S0
M140 S0
PRINT_START BED=[first_layer_bed_temperature] EXTRUDER=[first_layer_temperature]
EJECT_PURGE
End G-code
Cura
Machine Settings → Printer → Start G-code
AUTO_EJECT_GUARD
PRINT_START BED={material_bed_temperature_layer_0} EXTRUDER={material_print_temperature_layer_0}
EJECT_PURGE
Using these variables stops Cura from inserting its own heating commands.
End G-code
Object labels: see the next section.
Cura and slicers without native labels
Moonraker can add the labels for you. In moonraker.conf:
Restart Moonraker. Uploaded files that contain object tags are then rewritten with Klipper's
EXCLUDE_OBJECT commands. It works with any slicer that marks objects in comments.
Other slicer settings
- Skirt: turn it off, or keep it inside the area of the parts. A skirt is too thin for the blade to catch.
- Brim: fine. It comes away with the part.
- Without labels at all: use
STRATEGY=full_width, or setno_objects_action: "full_width". - G-code thumbnails: not needed for the eject, but the web page and the farm show each file with its picture when the slicer puts one in (where to turn them on).
Prints you will remove by hand
Prints lower than min_part_height (2 mm), such as stencils, are left on the bed automatically
(thin parts). For anything else, keep a second printer profile, or
swap the end G-code, without AUTO_EJECT:
The same file then works on a printer without the blade fitted.
DEMON Klipper Essentials
DEMON_END retracts the filament, so AUTO_EJECT goes after it
(integration.md):
In the start G-code, keep DEMON's lines exactly as DEMON gives them and add nothing: with DEMON,
AUTO_EJECT_GUARD runs in DEMON's _CUSTOM_PRE_START hook, because DEMON stops the printer when
something runs before DEMON_START for more than a few seconds. install.sh sets it up, or
~/klipper-auto-eject/install.sh --demon on a printer that has auto-eject already
(integration.md). The web page's In your slicer card
finds DEMON by itself and says the same.
Check the G-code
After slicing, open the G-code and search for:
| Look for | Means |
|---|---|
EXCLUDE_OBJECT_DEFINE |
Object labels are in the file |
EJECT_PURGE |
The pellet purge is in the start G-code |
AUTO_EJECT after your end macro |
The eject runs after the print |
If the labels are missing and Moonraker object processing is on, check the file in Mainsail or Fluidd: the Exclude objects button appears during the print once it has been processed.
Back-to-back printing
Queue jobs from Mainsail or Fluidd and turn on Moonraker's automatic transition. Moonraker describes this option as meant for machines that clear the build area themselves:
Don't put AUTO_EJECT in job_transition_gcode: Moonraker runs it only between two queued
jobs, so the last print of the queue would stay on the bed.